

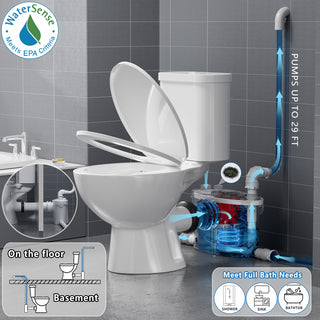
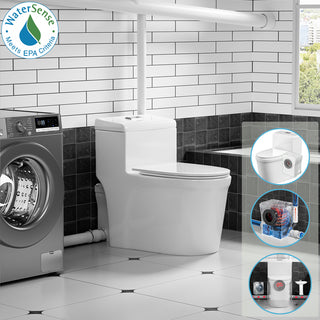


Adding a shower to a bathroom equipped with a macerating toilet can be a smart way to maximize limited space—especially in basement renovations or additions where traditional plumbing is difficult or costly. But to ensure smooth drainage and system longevity, proper plumbing is critical.
In this guide, we’ll walk through the correct steps for connecting a shower to a macerator pump, based on real-world installation best practices and code-compliant design.
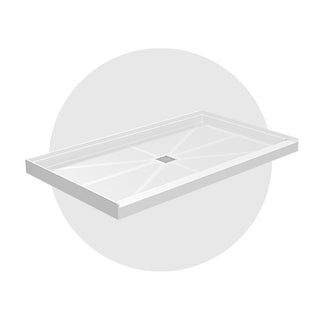
STEP1. Elevate the Shower Base
A macerator pump requires gravity-fed drainage from the shower. To achieve this:
- Raise the shower base at least 5.5 inches (14 cm) above floor level.
⚠️ Tip: This guidance is applicable whether a P-trap is installed or not; however, we generally recommend using a P-trap.
- This elevation allows for a minimum pipe slope of 2% (about ¼ inch per foot) to ensure continuous flow toward the macerator pump and prevent backflow.

STEP2. Connect the Shower Drain with a P-Trap
Install a P-trap beneath the shower drain. This trap retains water to block odors from rising up the pipe and ensures code compliance. The outlet of the trap will serve as the connection point for the horizontal drainpipe leading to the macerator.


* Disclaimer: Some step-by-step visuals used in this guide are screen captures from DIY JIM's content, for illustrative purposes only.
STEP3. Route the Drain Line into the Macerator Pump
Use a 1½-inch PVC or similar drainpipe to run from the P-trap outlet into the macerator pump’s inlet port. For a secure and sealed connection:
- Fit the pipe into the side inlet of the pump.
⚠️Tip: the pump’s side inlets are equipped with a built-in check valve, so there is no need to add an additional one.
- Use the included rubber coupling and hose clamp to fix the connection tightly.
- Avoid sharp turns—replace 90° elbows with two 45° fittings or use wide-sweep elbows to reduce resistance and improve flow.


* Disclaimer: Some step-by-step visuals used in this guide are screen captures from DIY JIM's content, for illustrative purposes only.
Vent the Shower Drain Properly
To prevent negative pressure and siphoning of the P-trap, your shower drain line should be connected to a main vent stack or a dedicated vent pipe.
This promotes proper airflow within the system and prevents sewer gas or water seal issues.
| ✦ Note: While many macerator units feature internal venting for toilet discharge, your local code may still require a separate vent for graywater sources like showers.
Additional Installation Tips
- Install a clog-resistant shower drain cover to prevent hair buildup and protect the macerator from clogging.
- Apply plumbing-grade sealant on all joints to reduce the risk of leaks and improve long-term durability.
- Make sure to test the entire setup before finalizing the installation—check for leaks, flow rate, and vent effectiveness.
Conclusion: Plan with Slope, Seal, and Safety in Mind
Plumbing a shower into a macerating system is straightforward with the right elevation, slope, and venting. By following best practices—from raising the shower base to securing every joint—you’ll ensure a clean, odor-free, and code-compliant installation.
Always check your local plumbing regulations and, when in doubt, consult a licensed plumber for final verification.
SimpleProject
Thank you for sharing your concerns.
Yes, in many cases the toilet vent can be connected to an existing main vent line instead of running a separate pipe through the roof, as long as it complies with local plumbing codes.
If the main vent is only about 3 feet away from the macerator, it may be a suitable option. However, the final setup should always be confirmed by a licensed plumber to ensure proper venting and code compliance.
dave
thank you for your info , VERY EDUCATIONAL
SimpleProject
Thank you for your valuable comment. At the moment, we don’t offer shallow P-traps, but local plumbing suppliers or trusted online retailers should be able to help you find the right size for your setup. Hope this helps.🥰
Peter Latreille
Thanks for the great advice, where can I get a shallow P-trap for my installation?
Ed Decker
Can you connect vent from main to toilet , the roof vent is very the main vent goes out on front porch, however it is only 3’ away from moderator!